Week 15: December 15, 2014
Project 3 Presentations
Today, we'll take a look at the collective fruits of our labor.
Let's focus on providing thoughtful and constructive feedback for everyone.
I would like for this discussion to be led by you not me.
A little structure...
For each student:
- First, we (the audience) provide feedback or ask questions based on observation.
- Then, you (the presenters) can talk a bit about what you were trying to accomplish.
- Finally, back and forth between all of us.
Course Evaluations
- Open your MICA mail (it must be your MICA mail account, or the link won't go to your specific evaluations)
- Look for an email with subject like "MICA Course Evaluations OPEN" (or "Reminder")
- Click on the Online Evaluations link in their email.
- Choose this course from the dashboard in EvaluationKit.
- Fill out the survey!
Project 3 documentation due Friday, December 19, 2014
Use the rest of the period to work on your documentation.
Homework
Project 3 documentation due December 19, 2014
I need the following from each student:
- 1 high quality, edited image (minimum) of your finished form. Neutral backdrop.
- 1 brief, edited video* of your work if there is an interactive component. 1-3 minutes. No music please.
- Files (excluding video/series of images) uploaded to each student's GitHub account using the repository structure established for classwork (src, exported, readme, license, images)
- In addition to the usual GitHub stuff, each repository should also contain a brief (roughly 200 word) PDF describing your project (goals, choices made, outcome, etc.)
* A series of 5-6 high quality, edited photographs documenting the interaction can be substituted for a video
Week 14: December 8, 2014
Project 3 Presentation
One student will be giving their final presentation today. We will have the presentation towards the end of class, at 2:30pm.
Make sure you are here at 2:30pm for this presentation. Participation is one of the most valuable parts of these critiques!
Project 3 work session
You have the period today to work on your final project. Make good use of this time with the machines!
If you like, you have the option to use the machines in Brown 217.
Make sure you are back here by 2:30pm.
Project 3 presentations next week
Bring your finished projects and be ready to talk about them. We'll be doing critiques!
Homework
Project 3
Finish up work on your final project.
Final presentations and critique will happen during class next week.
Course Evaluations Next Week
Bring a laptop, iPad, or smart phone to class next week.
You'll have time to submit your course evaluations during class.
Week 13: December 1, 2014
Reminder: Project 3 ideas due today
If you haven't talked to me about your project idea, yet, today is that day!
Guest Speaker: Matt Stultz
Matt Stultz is a 3D printing experimenter and maker. In addition to writing for Make: Magazine and the Make: Blog, he is the founder of HackPittsburgh, as well as founder and organizer of 3D Printing Providence and a founder of Ocean State Maker Mill.
Project 3 Work Session
You have the rest of the period today to work on your final project. Make good use of this time with the machines!
Homework
Project 3 - Ideas due today!
Chat with me in person about your project plan for the rest of the semester.
Project 3
Continue work on your final project.
If you are doing any experimentation with the printers or lasers, do your tests early and often! There's a big rush for the machines at the end of the semester.
Week 12: November 24, 2014
Reminder: Project 2 Documentation is due today
Make sure your project documentation is in a GitHub repository, with all of the required elements.
More Project 2 presentations
For those that missed out last week.
Let's focus on providing thoughtful and constructive feedback for everyone.
I would like for this discussion to be led by you not me.
A little structure...
For each student:
- First, we (the audience) provide feedback or ask questions based on observation.
- Then, you (the presenters) can talk a bit about what you were trying to accomplish.
- Finally, back and forth between all of us.
Project 3: Self-Driven Research Project
This project is to be completed individually.
The remainder of the semester is for you to realize one small, personally driven research project. This can include anything related to, or incorporating, 3D printing or laser cutting (or both).
You've all learned a lot of new tools and skills in this class. I want to see you pushing the limits of your abilities!
- Chat (or email) with me about your project plan for the remaining two weeks (Dec. 1st)
- Work presentations will be on the last day of class (Dec. 15th)
- Documentation and source code pushed to GitHub no later than Dec. 19th.
Schedule:
Dec. 1st: Work session. Discuss your project plan with me BEFORE THIS DATE.
Dec. 8th: Work session.
Dec. 15th: Project presentations.
Dec. 19th: Documentation due.
Brainstorming Exercise
To help with the process of coming up with a final project, let's do a collaborative brainstorming activity!
Thanks to my friends at Oil and Rope Games for this exercise.
Form Groups
Get into groups of 4 (there can be a single group of 5).
Group size is very important for keeping this exercise on time.
Think about some design goals
What are your goals for the final project? Here are some simple examples:
- Make something mechanically useful to solve a problem in my life.
- Make something that interacts with a real-world object to enhance or subvert its purpose.
- Make something that works around time and size limitations of 3D printing or laser cutting by clever connector design.
- Make something beautiful, disturbing, or otherwise thought-provoking.
- Make something that has a secret or non-obvious use or purpose.
- Re-make an everday object to better understand the challenges involved in its design and manufacture.
- ... These are just examples. Think of something that inspires or challenges you!
Part 1: Crazy 8s
On a sheet of paper, write down 8 different ideas for final projects using words and/or drawings that meet your design goals in some way.
This is a timed exercise and it moves very quickly - you'll have 10 minutes to spend on creating these ideas!
Some Tips:
- Create simple ideas.
- If you get stuck take a previous idea and change it slightly.
- Don’t be afraid to write down old ideas as well, once you have a few of those out of the way your brain will be clear to brainstorm new ideas.
Important: Just write something. Fill up 8 boxes with whatever you can come up with and don’t judge your ideas.
Some of the best ideas arise when you’re scraping the bottom of the barrel, so don’t be shy and keep writing!
Part 2: Crazy 8 Critiques
- One person presents all 8 of his/her ideas to the group (5 minutes per person)
- Everyone else critiques the ideas (5 minutes per person)
Critique Guidelines:
- Put a star on 2 or 3 of your favorite ideas from other group members.
- Be positive: focus on the ideas you like, not the ones you don’t
- Do the designs meet the designer’s goals?
- Take notes!
This is your time as a group to collaboratively brainstorm and bounce ideas off one another.
It’s possible the designer needs to reconsider their goals. Help the designer work towards -- or change! -- their goals. This is a time to figure out what we really want our goals to be: nothing is in stone yet.
Notes:
(Did your goals change? Were you inspired by another idea? What’s good or bad about what you heard?)
Part 3: Crazy 4s
We're going to do another 10 minute exercise, this time a round of crazy 4s.
In this round take the feedback you were given and/or other people's ideas and flesh them out further.
This time you'll only be creating and fleshing out 4 ideas in 10 minutes.
Remember your goal(s).
Part 4: Crazy 4s Critiques
- One person presents all 4 of his/her ideas to the group (5 minutes per person)
- Everyone else critiques the ideas (5 minutes per person)
Again, this is your chance as a group to collaboratively brainstorm and bounce ideas off one another.
Don’t forget to mark down stars on 2 or 3 of your favorite ideas!
Part 5: Final Round - 1 Idea
Here's another 10 minutes, this time to work on a single idea.
Incorporate all the feedback you've received so far to come up with a unique project idea that fits your design criteria for the final project.
Please note: this does not need to be the idea that you pitch to me for your final project in the class. You are free to use any techniques you like to come up with your final project idea!
Remaining time
Work on your project ideas for the final project.
If you are missing any homeworks or project documentation, now is a chance to work on those, as well.
Check the Assignments Page to see if you are missing anything.
If you need help with anything, please let me know.
Homework
Project 3 - Ideas due Dec. 1st
Chat with me in person or email me about your project plan for the rest of the semester.
The sooner you and I discuss your project the sooner you can get started!
Week 11: November 17, 2014
Project 2 presentations
Today, we'll take a look at the collective fruits of our labor.
Let's focus on providing thoughtful and constructive feedback for everyone.
I would like for this discussion to be led by you not me.
A little structure...
For each group:
- First, we (the audience) provide feedback or ask questions based on observation.
- Then, you (the presenters) can talk a bit about what you were trying to accomplish.
- Finally, back and forth between all of us.
Lunch
Lunch time!
Printrbots in 217
Don't be afraid of them!
Do buy 1.75mm PLA!
Do watch these videos!
Cura
Cura is a nice all-in-one slicing and printing solution that has some built-in support for Printrbots.
You can download it here.
You can find the manual here
Please note that Cura is primarily developed by Ultimaker and their documentation is largely geared towards their machine.
Still, the manual explains a lot about how to use the interface, where all of the various settings and preferences live, it.
Using Cura with Printrbots
Startup Wizard - Choose Printrbot

Update Settings
The default Cura settings for Printrbot may not give the best results. Below are some suggestions for getting a good profile together.
1. Nozzle size (mm) to 0.4
2. Change Start G-Code
Suggestions can be found here.
Remember that printers can differ. Your Mileage May Vary.
Example:
M104 S{print_temperature} ;set temperature line
G21 ;metric values
G90 ;absolute positioning
M82 ;set extruder to absolute mode
M107 ;start with the fan off
G28 X0 Y0 ;move X/Y to min endstops
G28 Z0 ;move Z to min endstops
M109 S{print_temperature} ;wait on temperature line
G29 ; Auto bed levelling
G92 E0 ;zero the extruded length
G1 F{travel_speed}
3. Be sure to save your profile (File | Save Profile)
4. Walk through Basic and Advanced print settings.
This should be familiar to you by now. Shells, infill, speed, temperature, filament diameter, etc.
5. Slicing is automatic (and fast!)
Printing from Cura
Make sure the printer is plugged in.
File | Print !
Remaining time
Work on your project documentation.
If you are missing any homeworks, now is a chance to work on those, as well. Check the Assignments Page to see if you are missing anything.
If you need help with anything, please let me know.
Homework
Project 2 Documentation
I need the following from each student:
- 1 high quality, edited image (minimum) of your finished form. Neutral backdrop.
- 1 brief, edited video* of your work if there is an interactive component. 1-3 minutes. No music please.
- Files (excluding video/series of images) uploaded to each student's GitHub account using the repository structure established for classwork (src, exported, readme, license, images)
- In addition to the usual GitHub stuff, each repository should also contain a brief (roughly 200 word) PDF describing your project (goals, choices made, outcome, etc.)
* A series of 5-6 high quality, edited photographs documenting the interaction can be substituted for a video
Week 10: November 10th, 2014
New Stuff!
I've put together an Assignments page that lists all assignments and what is due.
Using Meshmixer on the dFab Lab machines
If Meshmixer gives you errors about being unable to open
C:\Users\USERNAME\Documents\meshmixer\library\parts - your account is missing
some files. You will need to follow these steps to fix it.
- Download the missing parts folder (.zip file here)
- Open Explorer and navigate to the right destination:
- Find your Documents folder.
- It should have a meshmixer folder inside it.
- That should have a libraries folder inside it.
- Open up libraries - it should be empty.
- Open the parts.zip file that you downloaded.
- Drag the parts folder into the empty libraries folder
- Restart Meshmixer if it is running.
You may also have some issues with the Meshmixer popup announcing that a new version is available. If you see this pop up while you are trying to open a file or while another error dialog is visible, you will have to close the file dialog or other popup before you will be able to dismiss the new version dialog.
Today!
- Printable Tool Review
- Project 2 Work Session
Printable Tool Research Review
Let's go around the room and talk about your printed tools.
Project 2
Presentations on Nov 17th. Documentation Due by Nov 24th.
This project is to be completed individually.
For this project, I would like you to create and print a digital form by merging at least two clean 3D scans of one or more humans.
Use any modeling tools that you like. I recommend Autodesk MeshMixer.
Mateo kindly pointed out that the lab machines in Brown 217 have licenses for Skanect Pro - you can use these to export the full resolution scans if you like.
The dFab lab machines may also have full licenses. You will want to double-check before exporting.
Today is a work session - time to use the scanners, brainstorm with other students, do your modeling, and print.
Presentations and critique will happen next week.
Schedule:
Nov. 10th: Work session. Scan (help each other scan). Model. Print.
Nov. 17th: Project presentations.
Nov. 24th: Documentation due.
Homework
Project 2
Finish cleaning up your scans, manipulating your forms, and printing.
Presentations and critique will happen next class.
If you still have printing to do after class today, it is your responsibility to make time to visit the lab. Please take note of the lab's hours and/or talk to Ryan regarding options.
You can also take advantage of the new printers in Brown 217.
Week 9: November 3rd, 2014
New Printers in Brown 217
We have some new Printrbot Metal Simples in 217.
They work very much like the dFab RepRaps you're used to and they work with Slic3r and Pronterface.
Look for some documentation for them soon. For now you're on your own to use them without breaking them.
New dFab Documentation
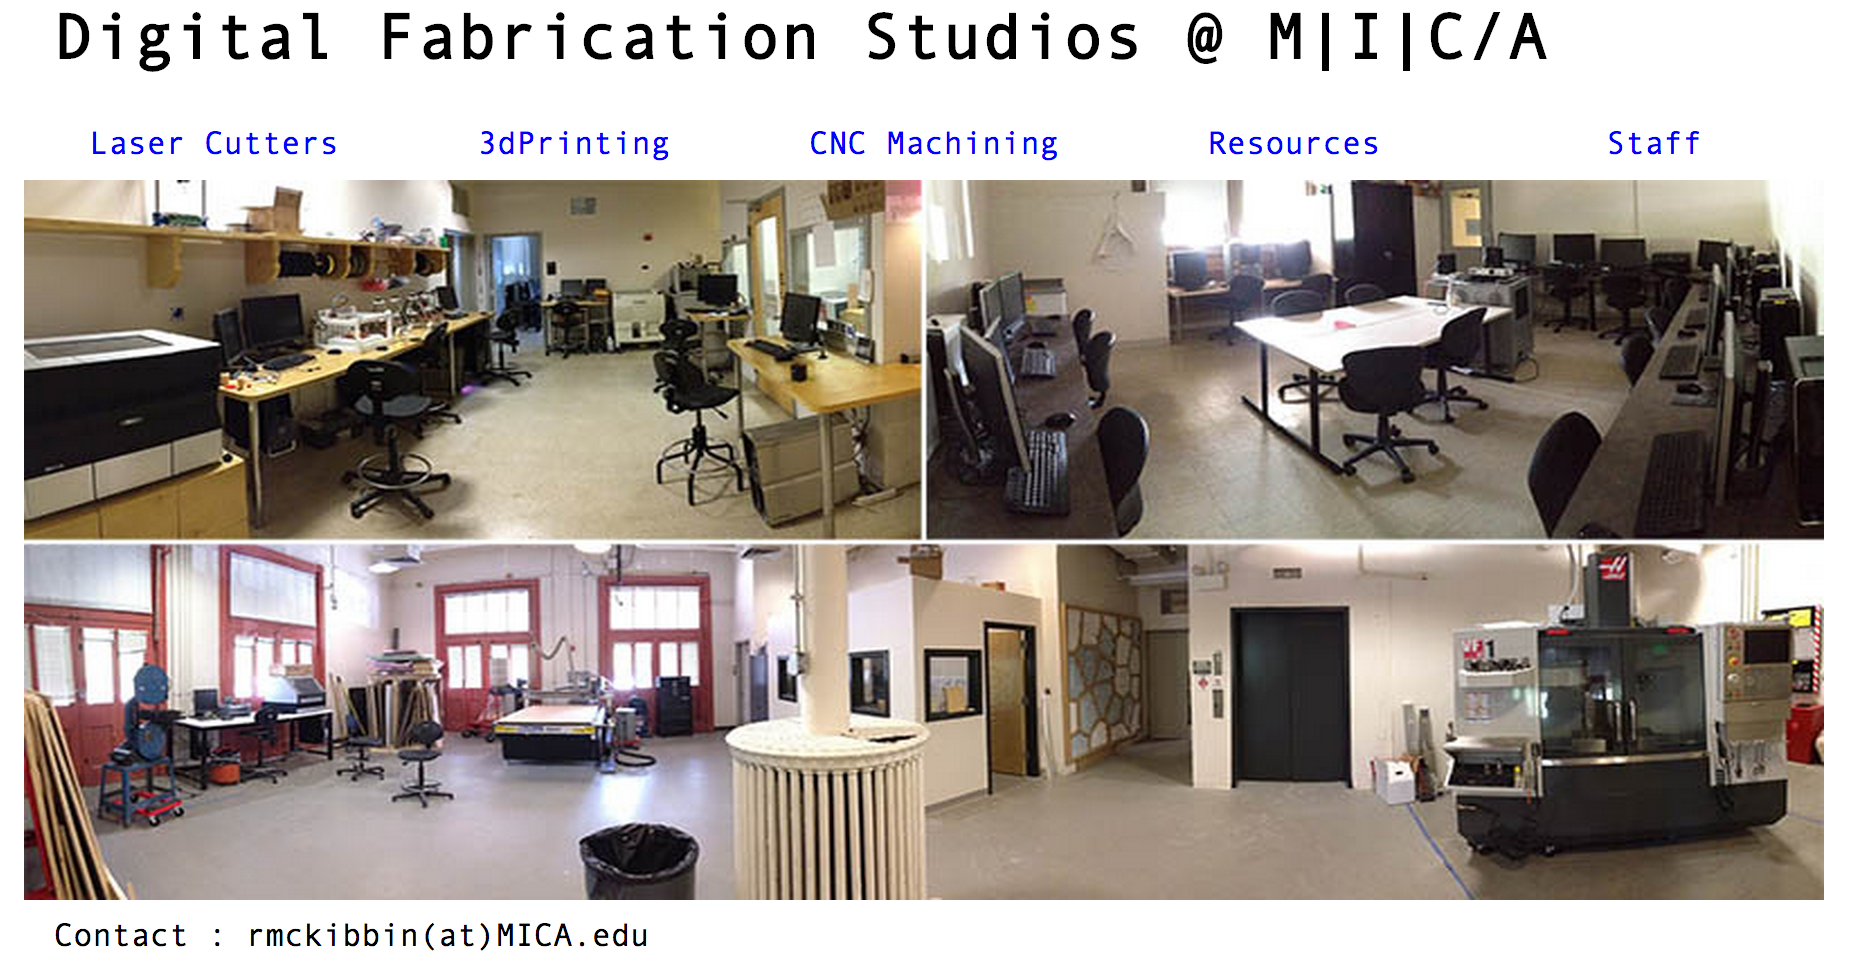
Ryan McKibbin is putting together an excellent collection of documentation for the dFab resources, including using (and troubleshooting) the 3D printers, the laser cutters, etc.
Check it out here. Try things out. Give him feedback if you run into trouble!
Speaking of Documentation...
Lots of folks having trouble turning in properly formatted HW and Project documentation.
Here are example repositories - no more excuses!
Today!
- 3D Scanning!
- Lunch
- More 3D Scanning!
Reminders
Project 1 Peer Review Forms
Take a few minutes to fill out the peer review forms that I sent to your MICA email address.
The details of the forms will be kept private, so please feel free to answer each question honestly.
HW4 (Parametric Design) Due
Make sure your HW4 documentation is in your GitHub account.
DIY scanning
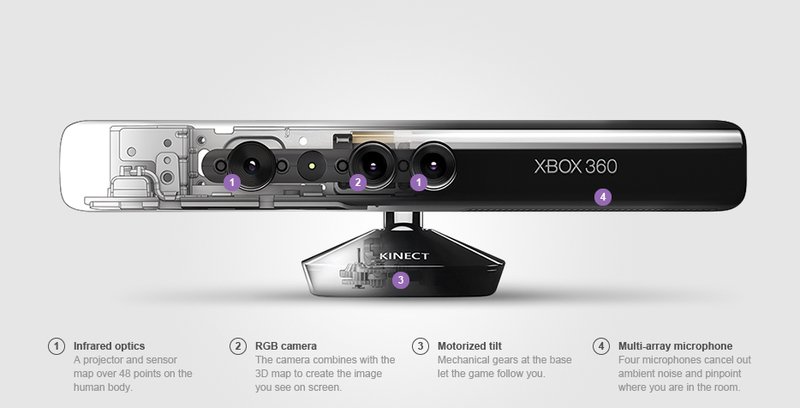 (Thanks WinBeta for the image).
Using the Microsoft Kinect (or other PrimeSense depth cameras) and Skanect.
Skanect can be downloaded from here.
Skanect is available on dFab's lab computers for those without laptops (or laptops incapable of running the software).
Skanect
Skanect is a low-cost 3D scanning utility which uses data from the Kinect, or other PrimeSense depth cameras, to construct watertight 3D models suitable for 3D printing. This software relies on open source technologies, but is not open source itself. However, a free version of the software is available for non-commercial use.
Some limitations...
- "Free" version exports at reduced resolution (limited to 5000 faces).
- Noisy scans which require clean up (some can be done in Skanect, others in Netfabb)
- Kinect has a minimum distance of about 2 feet
- Fussy process (be patient!).
Clean Up
The results of a scan from Skanect (or any other scanner) is going to be messy - not ready for 3D printing.
Check out some of these tutorials for ways to clean up your scans.
DIY Scanning

Work with a partner to create a printed self-portrait of each of you.
- Focus on the shoulders and up.
- Rolling/spinning chairs are your friend...
- Use cleanup tools to resize and trim .stl file. (maximum of 40mm high!)
- Print your portraits.
Print tools
Print your downloaded tool in ABS*. Be sure to adjust your Slic3r temperature settings accordingly (Filament Settings | Temperature)
*Be sure to check the instructions for the tool for suggestions on materials, infill, etc.
Please let me know if it was recommended to use PLA for your particular tool.
Homework
Manipulate your self portrait .stl with OpenSCAD (due Nov. 10th)
Use a combination of import() and for(){} to manipulate your self portrait.
import()function (info)for(){}loops (info)- When imported, an .stl file can be manipulated like any other form (including
intersect()anddifference()). - IMPORTANT: The .stl file must be in the same folder as your OpenSCAD file.
- Be sure to document on GitHub.
Printable tool research (due on Nov. 10th)
Find a tool which you think might be useful to you. Document your experience using the tool:
- Try to use the tool as much as possible over the course of a week (minimum 3 uses); making notes or taking photos to document the experience.
- Roughly 200 word (half page) document saved as a .pdf which describes your experience with the tool, including any suggestions you have for modifying it to better suit your needs.
- Include at least 3 photos with documentation.
- Bring tool to class next week.
Week 8: October 27, 2014
Welcome Back!
Shameless Plug: Baltimore Hackathon

Today!
- Another project 1 presentation!
- HW3 (laser cutting) review
- Toolmaking
- Lunch
- Reading Discussion
- Parameterization!
Project 1 Peer Review Forms
Take a few minutes to fill out the peer review forms that I will send to your MICA email address.
The details of the forms will be kept private, so please feel free to answer each question honestly.
HW3 Review
Similar to our project 1 review process.
- Show and discuss objects
- Talk about techniques used, lessons learned
Toolmaking
Unfold & Jonathan Keep
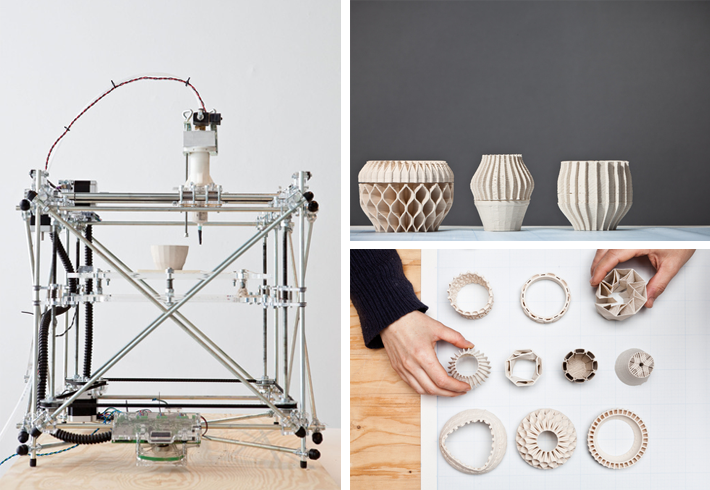
L'Artisan Electroniqueby Unfold with Tim Knapen, 2010
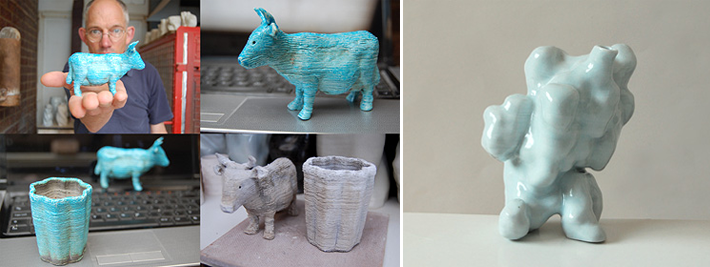
Jonathan Keep's DIY ceramic delta printer
Markus Kayser
Sun Cutter, 2010
Solar Sinter, 2011
Silk Pavillion
Biologically inspired/assisted fabrication from MIT Media Lab's Mediated Matter Group
DIY Inventions from 30 Years of Isolation
LUNCH
Discuss reading (excerpts from The System of Objects)
You will have 5 minutes to review the reading to pick out something which you find interesting and would like to discuss.
Parametric Design
A parametric form is designed to accept input in the form of parameters or arguments. The parametric toolkit for OpenSCAD consists of:
- Variables (a named value which can be used as a parameter) More info...
- Modules (instructions to build forms which can be reused and accept parameters) More info...
- Conditional statements (can be used to signal different versions or characteristics of forms from input parameters) More info... Brief and helpful suggestions for making your design parametric: link
Let's look at a parametric wrench (link).
And some more interesting parameterization...
Homework
Printable tool research (due on Nov. 10th)
Find a tool which you think might be useful to you. Document your experience using the tool:
- I recommend searching for your tool on Thingiverse.
- Have tool file(s) in class next week for printing.
- Try to use the tool as much as possible over the course of a week (minimum 3 uses); making notes or taking photos to document the experience.
- Roughly 200 word (half page) document saved as a .pdf which describes your experience with the tool, including any suggestions you have for modifying it to better suit your needs.
- Include at least 3 photos with documentation.
Parametric form (3 from 3 due Nov. 3rd)
Create a module which accepts three parameters, capable of producting at least three different, but related, forums.
- Export .stl files of 3 different forms.
- Document with a GitHub repository. Standard format applies.
- No need to print these, but do include renders if you decide not to print.
Week 7: October 20, 2014 (Break)
Fall Break!
We did not have class this week. See Week 6 notes for assignments.
Week 6: October 13, 2014
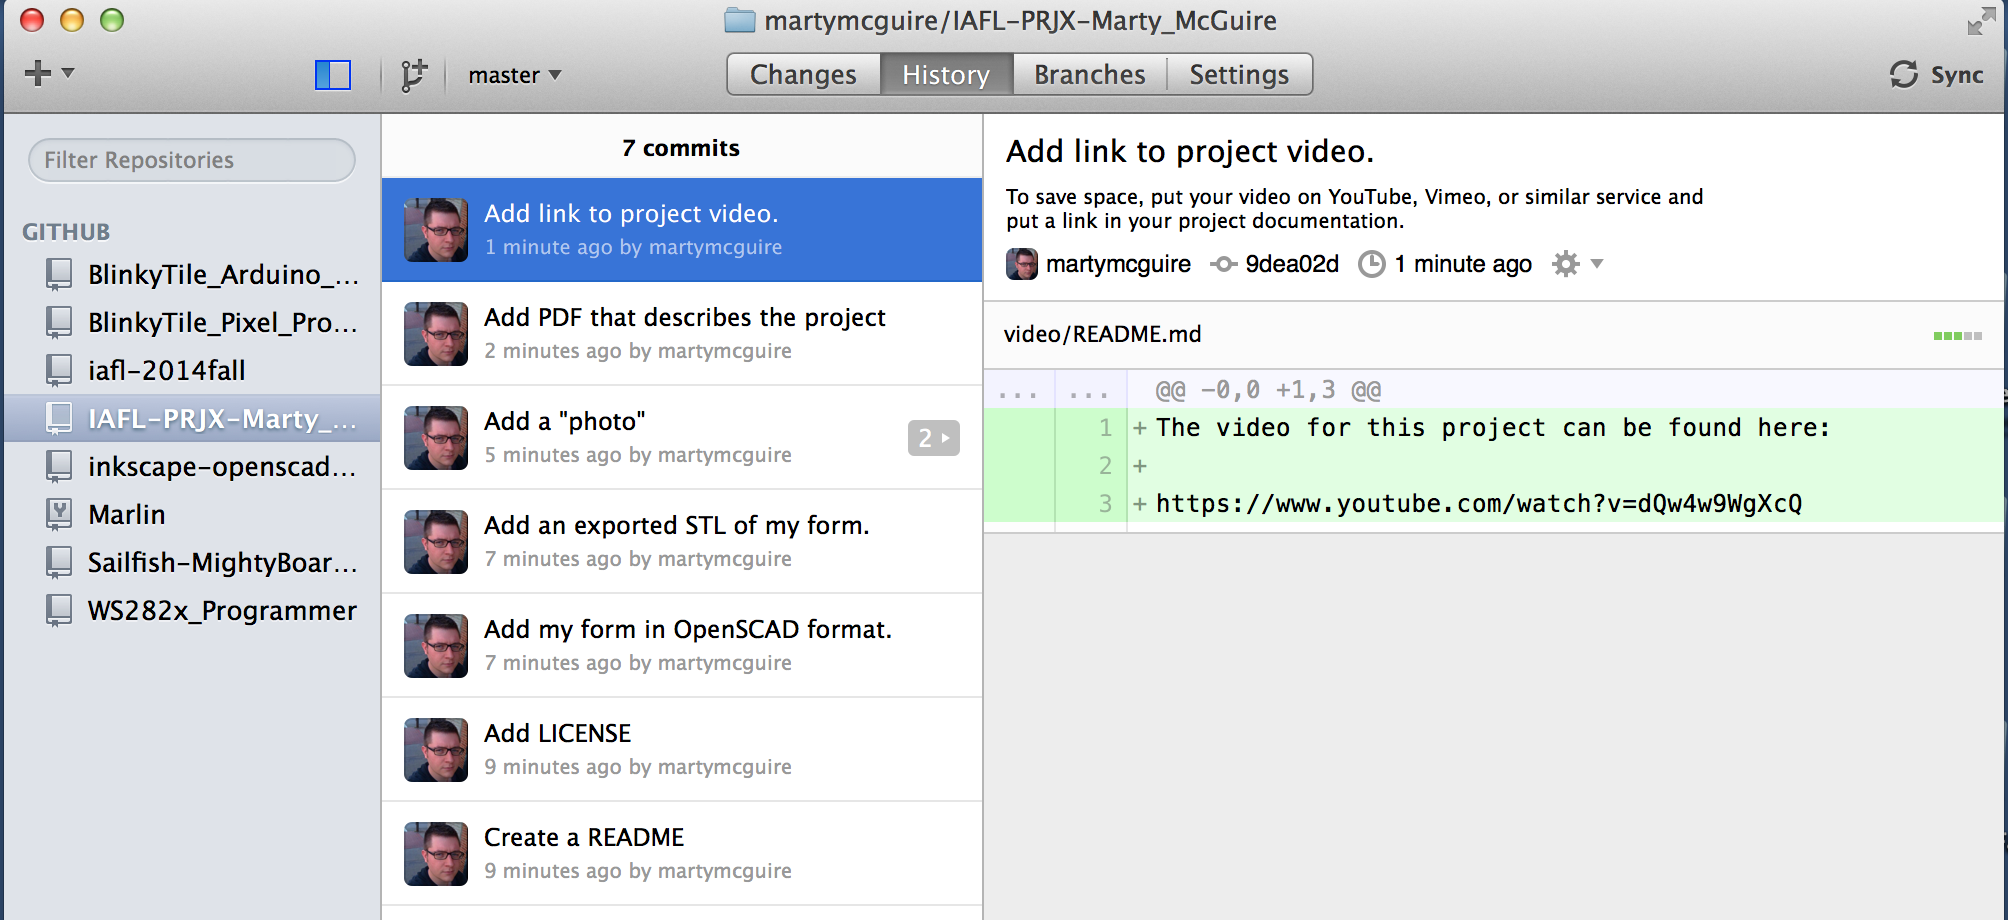
Live Action GitHub Tutorial!
- Create new repository
- Add folders for HW
- source
- export
- images
- Create commit with source file
- Create commit with export file
- Create commit with image file
- Create commit with README.md
- Create commit with LICENSE.txt
- Publish!
Project Documentation Questions?
Any questions or difficulties before we move on?
Meet the Laser Cutter (a.k.a. Laser Engraver)
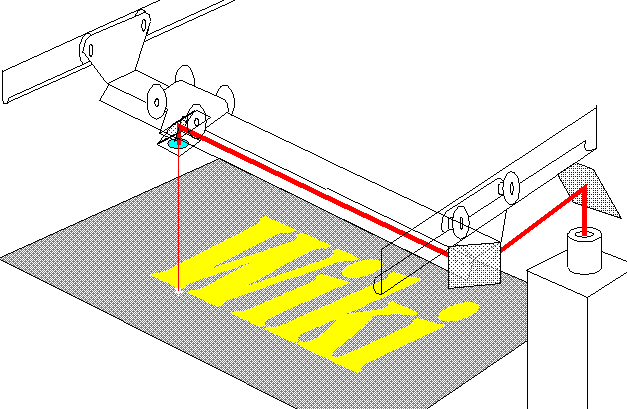 Image credit: wikipedia
Basic Components of a Laser Cutter
- Powerful laser beam directed by mirrors
- X/Y gantry moves around a set of "flying optics"
- Mirrors
- Lens to focus beam into cutting point
What Can a Laser Do?
Spikenzie Labs has a great write-up.
Meet our Laser Cutter
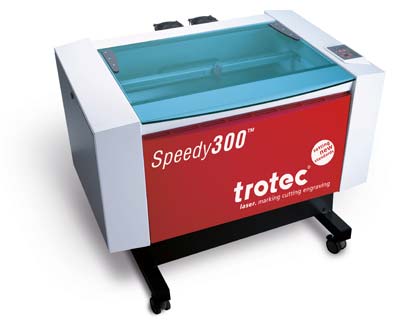
Trotec Speedy 300
- Maximum material size of 17"x29"
- Up to 120 watts of cutting power
- Air assist (ALWAYS USE THIS)
- A lab computer drives it
Supported Materials
Some materials are good for cutting, some only for engraving:
- Wood (untreated only)
- Plastic
- Leather
- Paper/paperboard
- Cardboard
- Some cloth
Some materials are NEVER OKAY. For example, anything with chlorine in it will off-gas chlorine as it vaporizes and permanently damage the lens
- NO PVC
- NO VINYL
- NO STYROFOAM
- Don't even engrave Moleskine notebooks.
Basic Laser Illustrator Workflow
Start with the dFab Laser Template - it contains swatches of all colors supported by the laser.
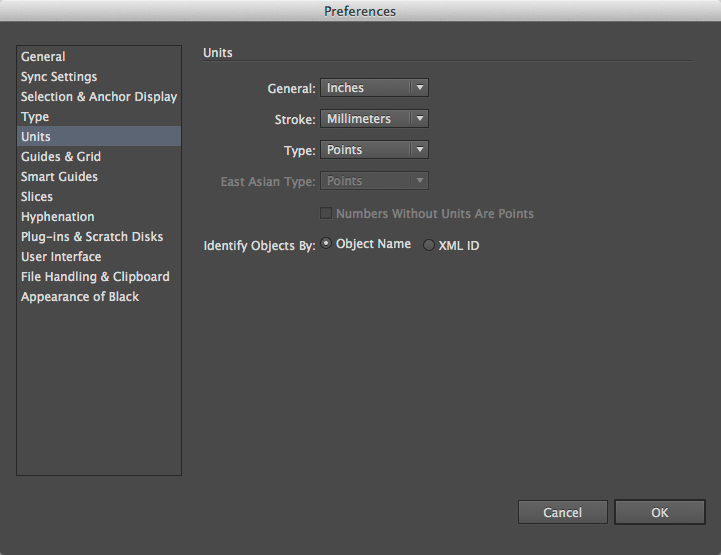
Make sure your Units settings in Preferences are correct:
- General should be set to Inches
- Stroke should be set to Millimeters
- Type should be set to Points
Put your paths for cutting on the "Cut" layer.
- Make sure Stroke color is the "Cut" color (pure red, a.k.a. RGB 255,0,0, a.k.a. #FF0000).
- Make sure Stroke Weight is set to 0.001mm. This is also known as "hairline width".
- Make sure Fill is set to none.
Put your paths for engraving on the "Engrave" layer.
- Make sure Stroke color is the "Engrave" color (pure black, a.k.a. RGB 0,0,0, a.k.a. #000000).
- Make sure Stroke Weight is set to 0.001mm. This is also known as "hairline width".
- To engrave only the outside of the path, make sure Fill is set to none.
- To engrave the inside of the path, make sure Fill is set to the "Engrave" color.
Update the "Positioning" Layer so that the orange box matches the actual size of your material.
Delete the helpful labels, etc. in the Layout layer, you won't need them.
Performing the Cut from Illustrator
Bring your Illustrator (
.ai) file to the Trotec lab computer on a USB stick.Open it in Illustrator. Select File | Print... to send it to the engraver.
That's it*!
* - That's definitely not it. Keep reading.
Actually Performing the Cut from Trotec Job Control Software
Open the Trotec Job Control software.
Review the settings for each color in the print job.
- Mode - each color can be set to Cut, Engrave, Ignore, or Position
- Cut - the laser will follow the vectors for each path of this color at the specfied power, speed, and frequency settings.
- Engrave - the laser will scan back and forth over the interior of each path of this color at the specified power, speed, and frequency settings.
- Ignore - paths of this color will be skipped for this run.
- Position - tells the laser the bounds of the material. Use this with the orange Position layer only.
- Speed - how quickly to move the laser while it is powered on
- Power - percentage (0-100%) power to apply to the laser when it is powered on
- Frequency - (10000 - 60000) the laser isn't continuous - it pulses. A higher frequency results in smoother cuts but requires a lower speed.
- Use air assist? ALWAYS USE AIR ASSIST.
- Mode - each color can be set to Cut, Engrave, Ignore, or Position
Ready to cut, yet? ALMOST.
Preparing the Laser and Work Piece
Make sure both air vents are open.
Make sure all air pumps are switched on. This switch is located outside the laser booth.
Make sure the laser is powered on.
Place your material at the 0x0 point in the upper-left corner of the bed.
Focus the laser:
- Move the lens assembly out over your material
- Hang the focusing guide on the lens assembly
- Lower the bed so the guide is clear of your material.
- Use the onboard controls to raise the bed until the moment that the guide falls off.
Close the cover.
Finally: FIRE THE LASER.
WATCH YOUR LASER JOB. DO NOT LEAVE THE ROOM FOR ANY REASON WHILE THE LASER IS ACTIVE.
Safety!
Once again: WATCH YOUR LASER JOB. DO NOT LEAVE THE ROOM FOR ANY REASON WHILE THE LASER IS ACTIVE.
In the event of fire or lots of smoke:
- Open the cover of the machine to immediately stop all laser activity.
- If the fire doesn't go out on its own, place the burning piece in the fire bucket in the corner of the laser booth!
Laser Materials Testing
Today we'll be testing to find some good laser settings for cutting and engraving your materials!
Pair off to make this go faster - we'll have ~8 groups using the laser today.
For each material that you have, we're going to run through the following test procedure.

Note that there are 12 different test color swatches in the dFab Laser Template.
- Follow the above steps to send a job to the Trotec control software.
- No need to worry about artwork for the Cut and Engrave layers.
- Set all layers to Ignore except for the orange Positioning layer.
- Choose 3 colors to try out Cut settings on.
- You're varying speed, power, and frequency.
- Carefully write down which settings you applied to which colors.
- Choose 3 colors to try out Engrave settings on.
- You're varying speed, power, and frequency.
- Carefully write down which settings you applied to which colors.
- Run the laser job, following all safety measures.
- Afterwards, examine and record the results.
- Did the cut go all the way through?
- Does the material surface look very burned?
- Do the edges of the cuts/engraving look smooth?
- Iterate! - Based on your result, choose 3 new settings to try for Cut and 3 new settings to try for Engrave.
- Repeat steps 1-6 using the remaining 6 test swatch colors.
A good Cut should:
- Use just enough power to cut through the material without scorching it (adjust power).
- Leave clean edges without many jagged areas (trade off frequency and power).
- Be pretty fast (trade off speed and power).
- Succeed in one pass. Thicker (≥1/4") materials may need multiple passes, however.
A good Engrave is similar to a cut, but should by no means go through the material. The goal of an Engrave is usually to burn away a little material in order to add text or other important markings to the work piece.
If, after two iterations, you are happy with your results, you may stop. Otherwise, rotate your material 180º and try again.
Be Sure to Document Your Work
- Photograph the results of each test run.
- Carefully record the settings you used and the results for each.
We are going to share all of our results in a shared repository.
Please see the IA Fablab 2014 Fall Laser Materials Settings repository for more info on how to share your results.
Meanwhile...
Only a pair of people will be lasering at a time. While you're waiting for the laser, please review these interesting lasercut designs from Thingiverse:
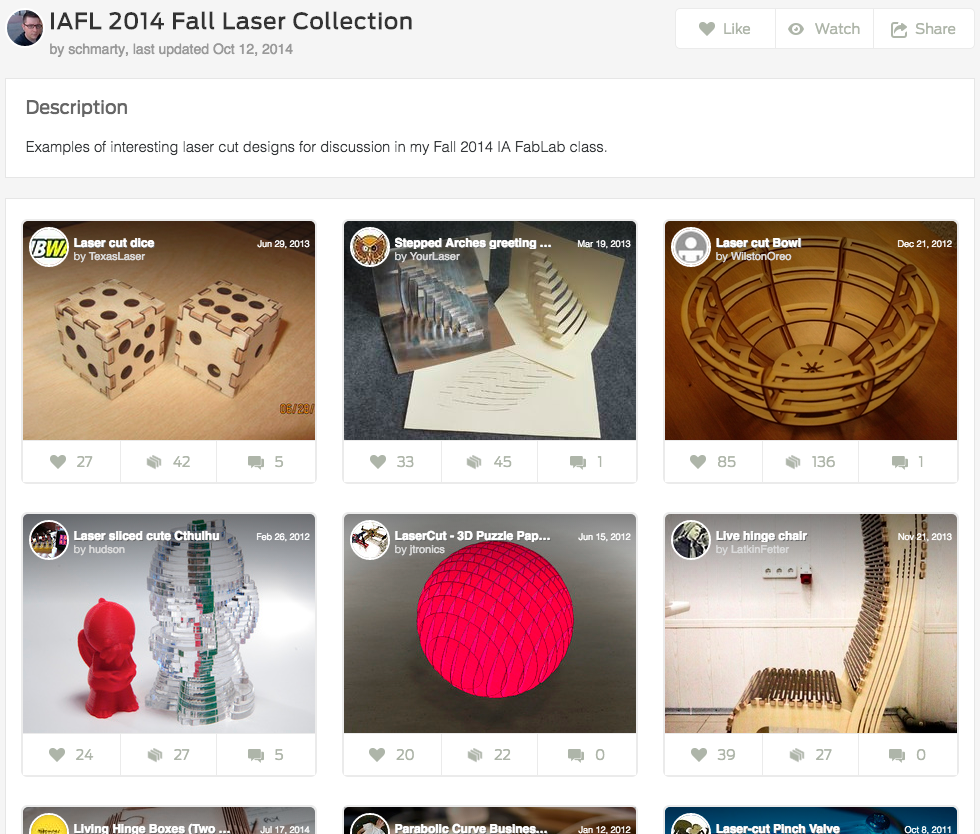 IA FabLab 2014 Fall Laser Collection
Think about the techniques you are seeing.
- What features or properties do they give to the resulting assembly?
- What limitations might these techniques have?
- How might they be accomplished in Illustrator? OpenSCAD?
You can also use this time to:
- Fix up your GitHub repositories for HW1, HW2, or project 1.
- Do the fall break reading.
- Get a head start on your laser cut design for HW3 (due Mon. October 27th).
Homework
FALL BREAK!
No class next week.
Enjoy the break! And burn things with the laser!
Before October 27th Class - Do This
Follow the instructions on the IA Fablab 2014 Fall Laser Material Settings repository to turn in your material testing results.
Before October 27th Class - Do This
Design a simple form to cut/engrave on the laser using your own materials.
- "Simple" meaning something you can cut out of a single sheet of a material of your choice no larger than 18"x12".
- You should use Illustrator (start with the template!) to create your design.
- Remember to cut during dFab Laser Hours.
- Note that the dFab will be closed Monday and Tuesday October 20 and 21st.
- Create a GitHub repository (name it
IAFL2014-HW3) for your design including:- A
sourcefolder with your Illustrator (.ai) file. - An
imagesfolder with images of your finished assembly. - A
README.mdfile including:- The assignment description.
- About 200 words describing your project.
- The laser settings (speed, power, frequency) that you used for cutting and/or engraving.
- A
Before October 27th Class - Read this
The System of Objects (excerpts from Structures of Interior Design and Structures of Atmosphere) by Jean Baudrillard (link)
We'll go over this in class on October 27th.
Week 5: October 6, 2014
Gentle Reminder
No food or drink in the dFab Lab.
Take turns with one another to take food and drink breaks.
Project presentations
Today, we'll take a look at the collective fruits of our labor.
Let's focus on providing thoughtful and constructive feedback for everyone.
I would like for this discussion to be led by you not me.
A little structure...
For each group:
- First, we (the audience) provide feedback or ask questions based on observation.
- Then, you (the presenters) can talk a bit about what you were trying to accomplish.
- Finally, back and forth between all of us.
Remaining time
If you haven't already, convert your HW1 and HW2 turnins into 2 homework repositories on GitHub.
Follow the structure laid out in the week 3 homework for credit.
If you need some help with GitHub, please let me know.
Homework
Project Documentation
I need the following from each member of each group:
- 1 high quality, edited image (minimum) of the connected forms plus an additional image of each individual form. Neutral backdrop.
- 1 brief, edited video* of your work if there is an interactive component. 1-3 minutes. No music please.
- Files (excluding video/series of images) uploaded to all members' GitHub account using the repository structure established for classwork (src, exported, readme, license, images)
- In addition to the usual GitHub stuff, each repository should also contain a brief (roughly 200 word) PDF describing your project (goals, choices made, outcome, etc.)
* A series of 5-6 high quality, edited photographs documenting the interaction can be substituted for a video
Buy this
Time to get some laser materials!
The easiest stuff to work with is going to be 1/8"-thick acrylic or birch plywood sheets. No larger than 24"x12".
Inventables is one of the most reputable places to order materials.
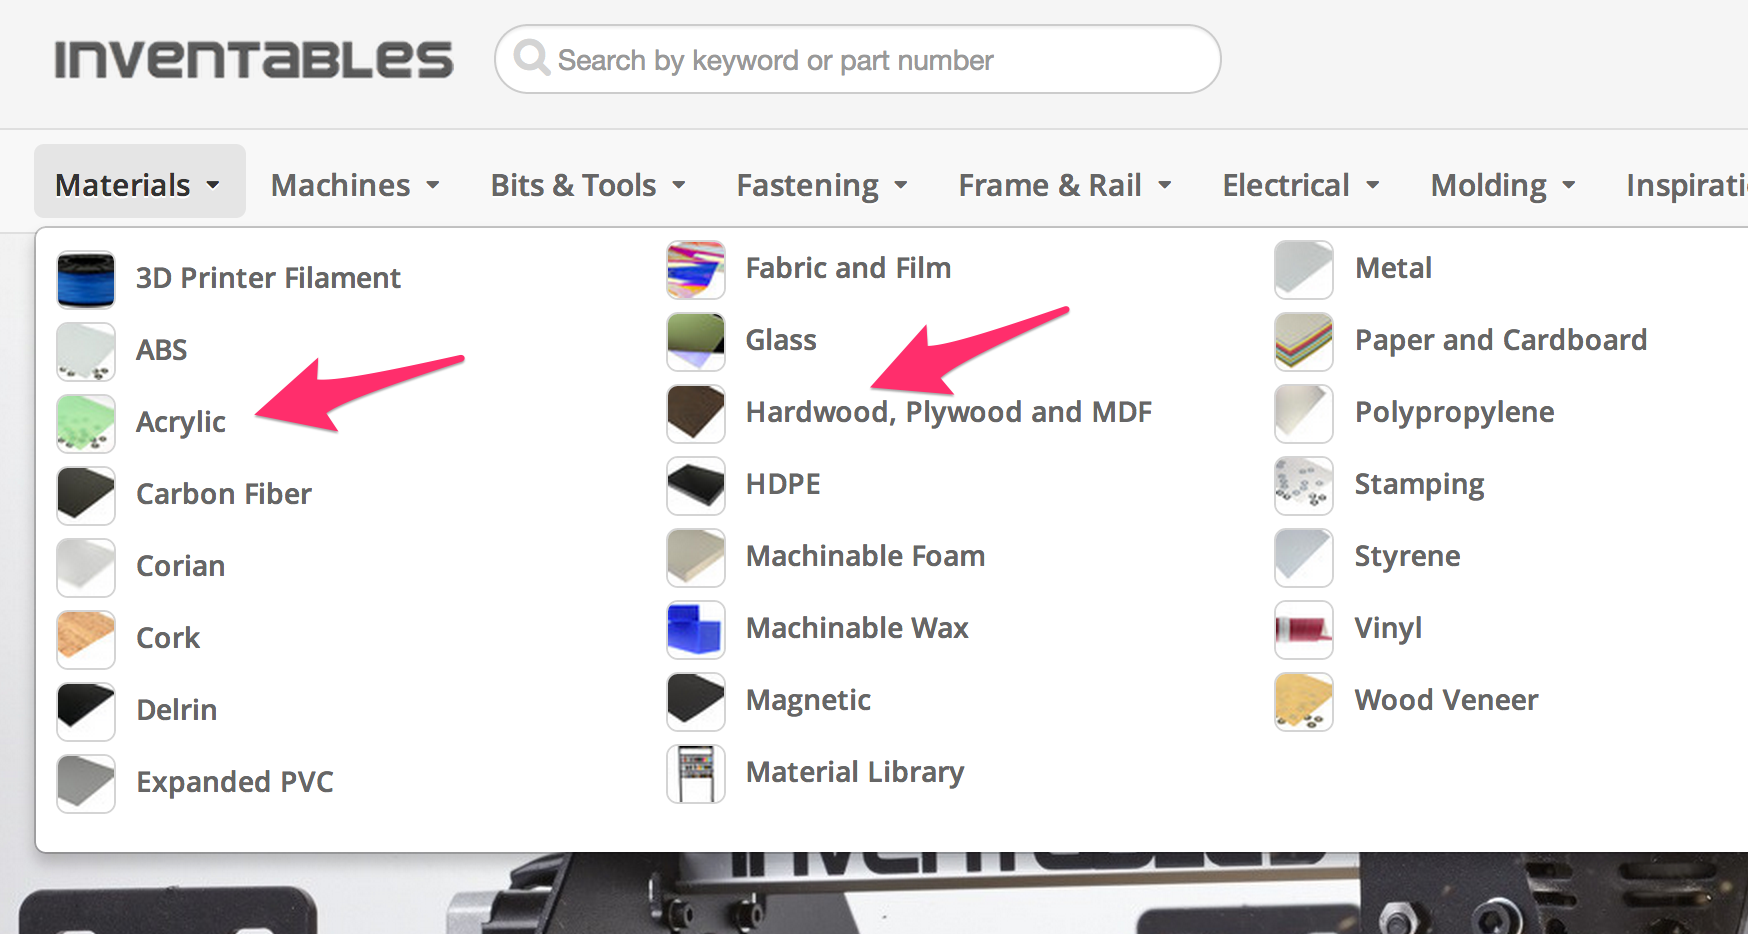
Bring your laser materials to class on Monday. We'll be going through a process to determine the best settings for cutting and engraving our chosen materials.
Read this
The Ponoko Starter Kit for Adobe Illustrator.
While it is geared towards the specific offerings of the Ponoko manufacturing service, their starter kit has lots of good information about creating designs in Illustrator that will produce good results on a laser cutter.
Some things to note:
- We're limiting our materials to birch plywood and acrylic.
- The dFab lasers only fit materials around 24"x12".
- We have our own dFab Laser Template for Illustrator.
Week 4: September 29, 2014
GitHub usernames
I would like everyone to write their GitHub username on the piece of paper which I'll be passing around. Do this first.
OpenSCAD
Any questions about creating modules?
2D to 3D
Using Adobe Illustrator to create an extrudable shape.
- Download this Adobe Illustrator script (here).
- Create your vector in Illustrator.
- Move path(s) to 0,0 on the artboard to get a decent reference point.
- Organic shapes should be simplified using Object > Path > Add Anchor Points and Object > Path > Simplify...
- Select path(s) & run script using File > Scripts > Other Script... (then choose
paths_toscad.jsx) - Open the file in OpenSCAD.
- This is supposed to use 1 point to 1 mm, however you will need to double check the results. Use resize in OpenSCAD to scale things properly.
Test fitting
Use the digital calipers to create a form which fits onto your found object. Keep the printed form small and iterate until you have a good fit. You may need to use sandpaper or an exacto knife to help reshape the form; this is normal. :)
Open Studio
You have most of the period to work on your project. If the printers are in use and you would like to leave and try again later, please let me know. I'll ask you to show me the exported .stl or .scad file first.
I will be around to provide assistance as needed. Please let me know if you need any help.
Lunch
You can print during lunch - either watch the print yourself or take turn watching each other's prints.
Guest Speaker!
Please welcome Todd Blatt, a Baltimore-area 3D designer.
Homework
Project is due next week
Complete project. If you still have printing to do after class today, it is your responsibility to make time to visit the lab. Please take note of the lab's hours and/or talk to Ryan regarding options.
Two important things:
- Do not wait until the last minute to print. (This will not be an acceptable excuse next week for your incomplete work.
- The dFab lab is not a turnkey fabrication service. You must monitor your own prints.
Week 3: September 22, 2014
Hello!
MakerFaire/MakerCon recap
Today!
- Guest Speaker!
- Discuss Medium by Malcolm McCullough
- Homework review
- Review OpenSCAD 2
- GitHub Introduction
- Slic3r Part 3 (infill, shells)
- Changing Filament on RepRap
- Printing
- Lunch
- Discuss project, next homework
- More printing
Guest Speaker
Michael Curry, Independent Designer and 3D Printing Evangelist based in Kansas City.
Discuss Medium by Malcolm McCullough
Take 5 minutes to review the reading and pick out something which you find interesting and would like to discuss.
Homework and OpenSCAD 2 Review
Any questions about...
- minkowski
- hull
- scale
- resize
- ?
GitHub!
1962 by Raphael Bastide (GitHub repository)
- What is GitHub?
- Why should you care? (as artists/designers/people who like to share who are working with code)
- Repositories (What are they?, creating, forking, cloning)
- Simple workflow (work, commit, work, ...)
- Branches (how to create, how to merge)
Slic3r Part 3
- Experiment with infill!
- Shells and fill settings.
RepRap Filament Change
Easier to show than explain. Ask a tech to show you on your first try.
- Heat up hot end
- Motors off
- Pinch extruder to release tension on filament and pull filament out.
- Insert new filament and release.
- Extrude until filament color changes completely.
NetFabb Cloud
Quick update from last week: NetFabb offers an online service for repairing STLs.
If you are having troubles, feel free to tree NetFabb Cloud.
Print Some Stuff!
Print your objects from this weekend, either individually or with a partner (if your objects are small enough to fit on the same plate). Experiment with infill and shells to decrease print time. If you are unable to print today, you will have to visit the dFab lab before next week to finish.
Project 1: Conversation
Presentations on Oct. 6th. Documentation Due by Oct. 13th.
Don Norman on affordances
This project is to be completed by 2 people (a group of 3 is okay).
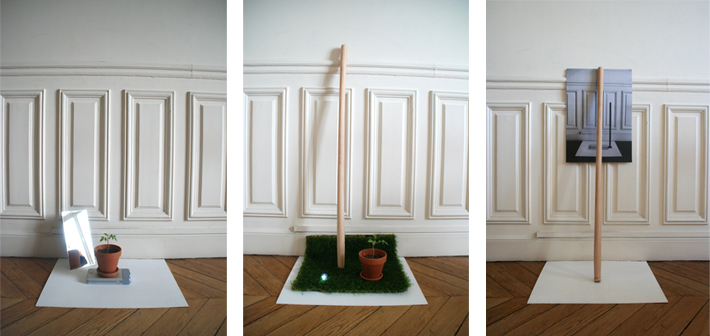
For the first project, I would like you to create a set of objects (1 per person in your group) which are somehow connected by a non-printed found object. Use the found object's pre-existing affordances to create or highlight a relationship between the printed parts. The dimensions of your printed objects will be determnined by the properties of your found object.
Let's pick partners today (maybe right now?) Let me know in person or by email when you've formed a group.
Schedule:
This week: Form groups, find objects, choose ideas.
Sept. 29th: Work session - measurements and printing.
Oct. 6th: Project presentations.
Oct. 13th: Documentation due.
Homework
OpenSCAD
- Modules in OpenSCAD (here)
GitHub
Create two repositories which include the following:
- A source folder (named src or source) which contains your .scad file(s).
- An export folder (named dist, stl, or exported) which contains your ready-to-print .stl file(s).
- An images folder (named img or images) which contains at least one edited image of your printed object.
- A file named README.md which describes the assignment or object. (How Markdown formatting works).
- An open source license of your choice (Probably MIT or GPL, but refer to choosealicense.com for assistance.)
Project
Brainstorm with partner and...
- Search for potential interface objects (bring to class next week).
- Create sketches on paper of possible forms to conncet with the found object.
Week 2: September 15, 2014
Welcome Back!
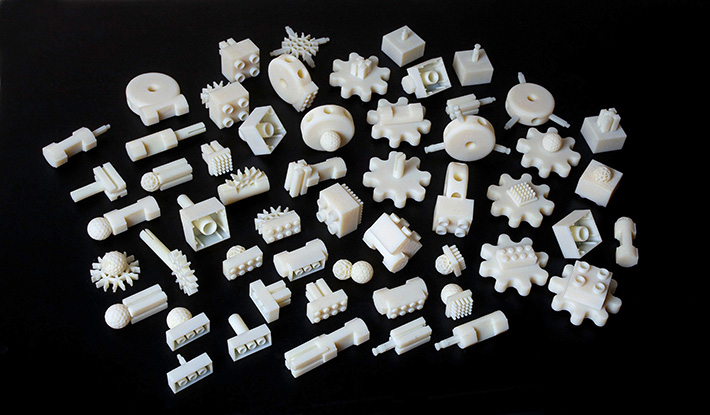
Free Universal Construction Kit by F.A.T. Lab.
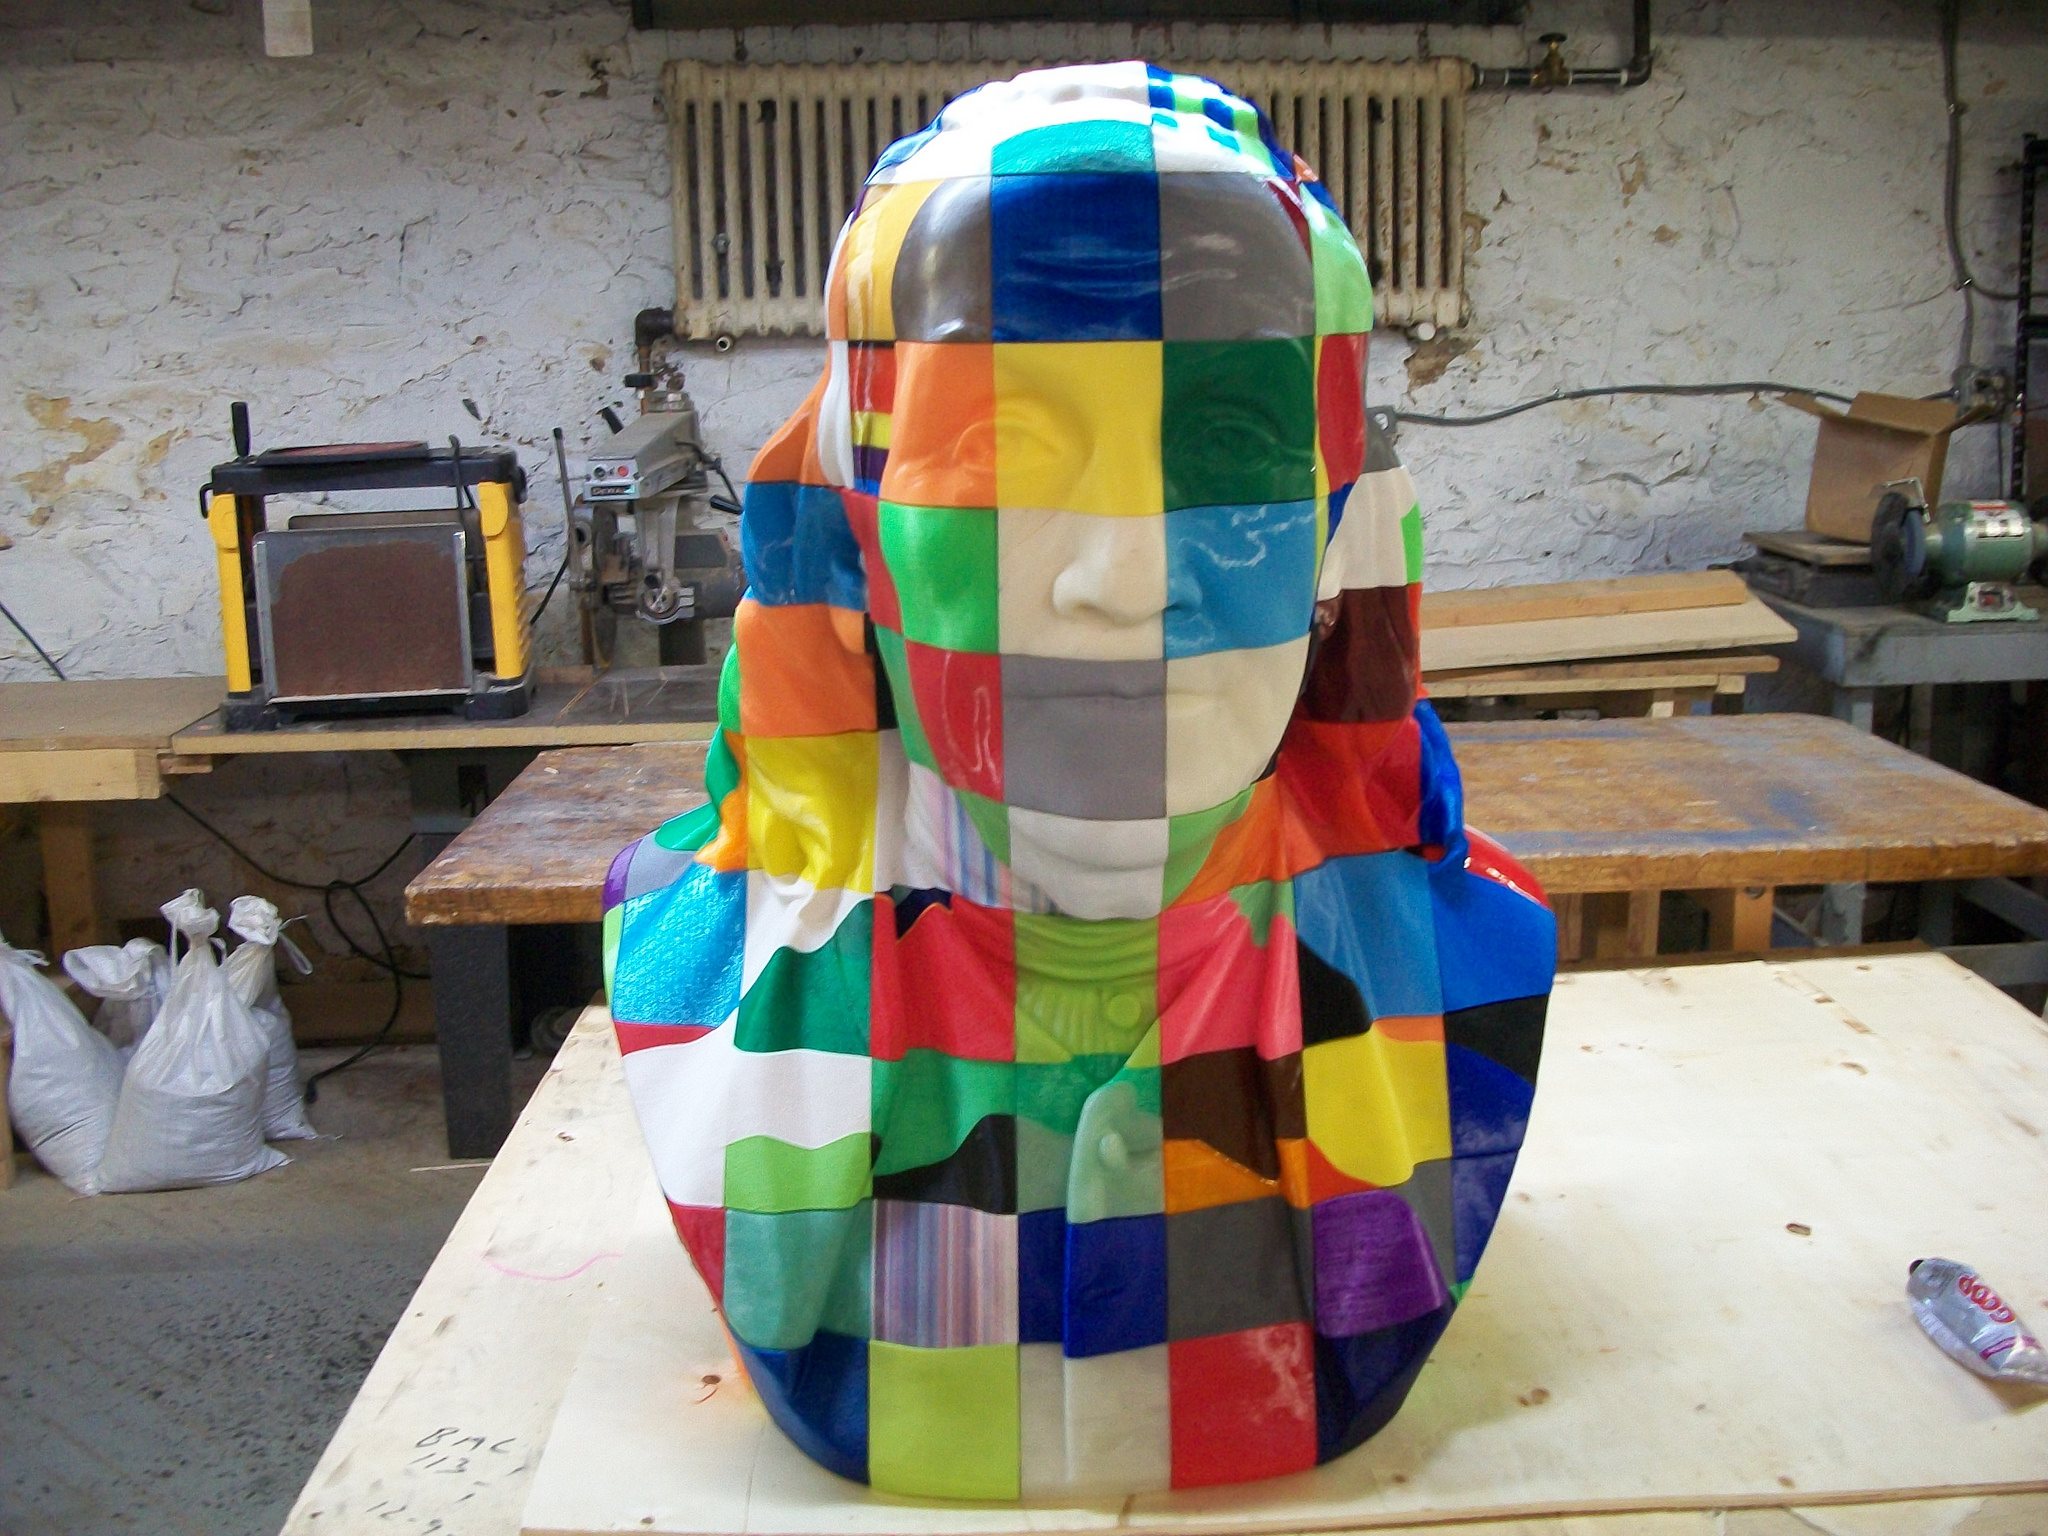
Benjamin Franklinstein by We the Builders.
Today!
- Intro to UP!
- Homework review
- Intro to OpenSCAD and NetFabb Basic
- Slic3r (multi-part and support material)
- Printing
- Lunch
- Guest Speaker!
- Discuss next homework
- More printing
Intro to UP!
Today I brought in an UP Plus 2. Also known as the Afinia H-Series.
- These belong to the Interactive Arts dept.
- Available in Brown 217 (door is coded)
- Grab the UP! Software
- Be sure to follow the steps in the Quick Start Guide.
- Heat and test extrusion
- Use the leveling probe to auto-level the bed
- Use the nozzle height probe to automatically determing nozzle height
- Print!
If you get an error about the print being out of bounds, check the settings under 3D Print | Calibrate. Click the Reset button, then set X1, X2, Z, and H to these values:

X1: 124, X2: 124, Z: 0.0, H: 42
Homework Review
- Let's look these over!
- Please name your OpenSCAD file like so:
lastname_firstname_hw1.scad - Upload them to the HW1 Drive Folder
Review OpenSCAD Basics
Any questions about OpenSCAD tutorial?
- Basic forms (cube, sphere, cylinder)
- Transformations (scale, color, rotate, translate)
- Combining forms (difference, intersection, union)
- Compiling and rendering
- Exporting .stl file
NetFabb Basic
Netfabb Basic is a free program which can be used to verify and repair .stl files. You will need to use this if Slic3r complains about a hole in your .stl file.
- Repairing files
- Exporting repaired .stl files
- Instructions here.
Even better:
- NetFabb Cloud can do all of these things for you with a simple upload to your browser.
Slic3r (part 2)
- Multiple objects on the same plate.
- Brims and support material.
Let's print some stuff!
If you were in the last groups to print last week, then you are first to print today.
Print with a partner. Please plate both objects together in Slic3r and then generate G-Code.
If you are really not interested in printing the form you made with OpenSCAD over the weekend, you have two choices:
- Make another form!
- Print out one of the .stl files from the Free Universal Connector Kit
Remember to "kick the tires"
Before you home the printer, you must inspect the printer. EVERY TIME!
- These printers have 3 endstops (switches). Know where they are.
- Move X and Y axis until you hear click of the switches. You will be heading oward the front left corner of the bed.
- Look at Z endstop. Does it look like it lines up with the x-carriage above it? Make sure it does.
- Put fingertip on the endstop and click the Home Z button in Printrun. Still look good? Hit home button again.
- Ideal spacing between nozzle and the glass bed is just enough space to fit a piece of paper under. Adjust endstop until it feels right.
- Test other areas on the bed by tunring off motors in Printrun and manually moving X and Y. Use corner levelers if it is way off.
- Clean off any old residue with a scraper. Clean dust and grease with vinegar and paper towel. Clean bed!
- Pre-heat the extruder and do a test extrusion before starting your print.
- Pre-heat the bed, too!
- EVERY TIME!
Guest Speaker
Shawn Grimes, Director of Technology at the Digital Harbor Foundation.
Homework
Do this stuff:
- OpenSCAD tutorial 2 (ignore multmatrix) (here)
- Begin working on a small form (less than 6cm in its biggest direction). Bring .scad file to class next week. You will have time to work on your forms in class, but printing priority goes to those with finished models.
GitHub
Finish reading/read this stuff (we'll discuss it next week):
Week 1: September 8, 2014
Welcome!
- Introduction to the class, syllabus review.
- Entrance Survey
Thanks to Sam Sheffield for much of the following content.
Start Making!
David Kelley, founder of IDEO.
Let's talk about cars
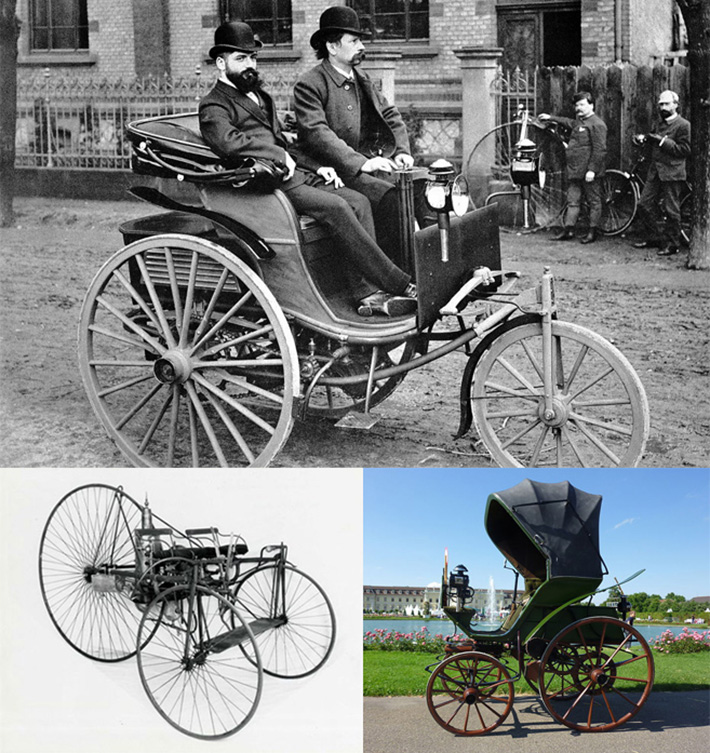
Early cars circa late 1900's
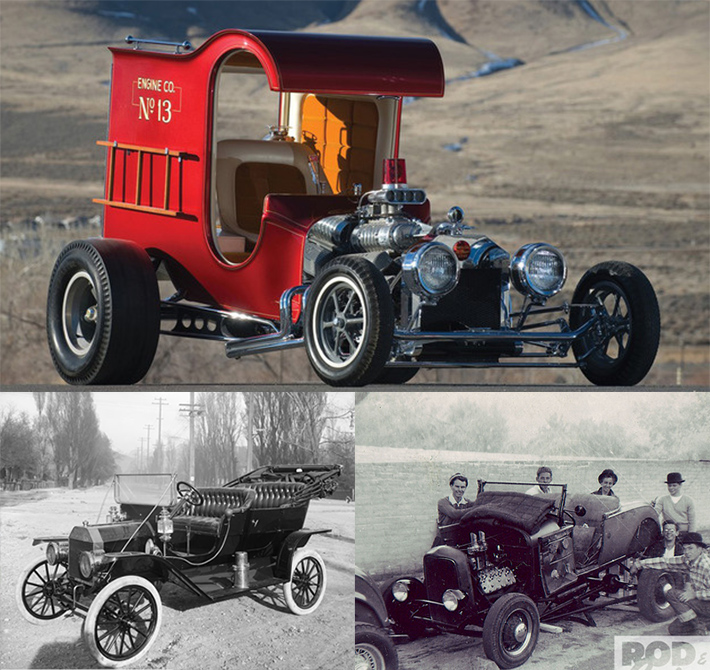
Hot rods of the 1930's - 1960's
"Next industrial revolution?"

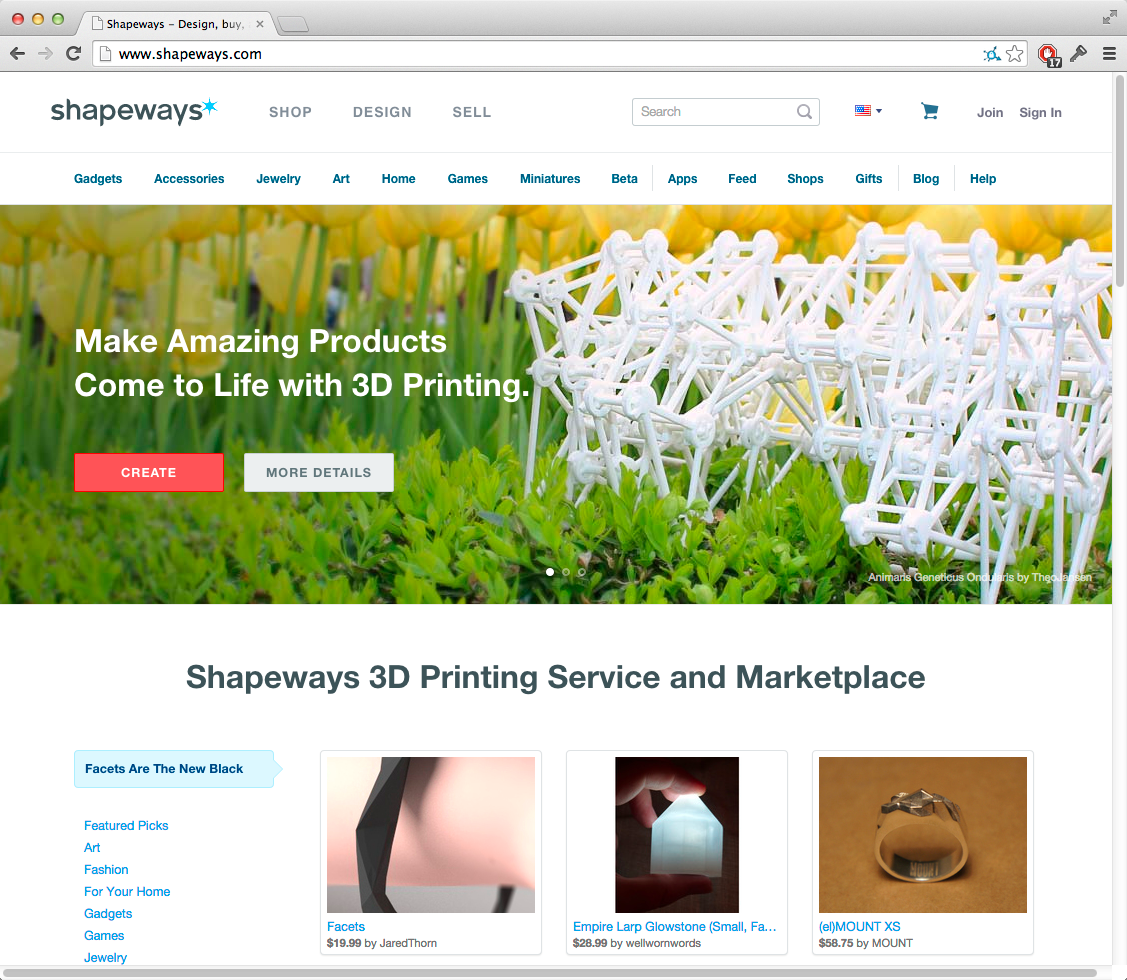
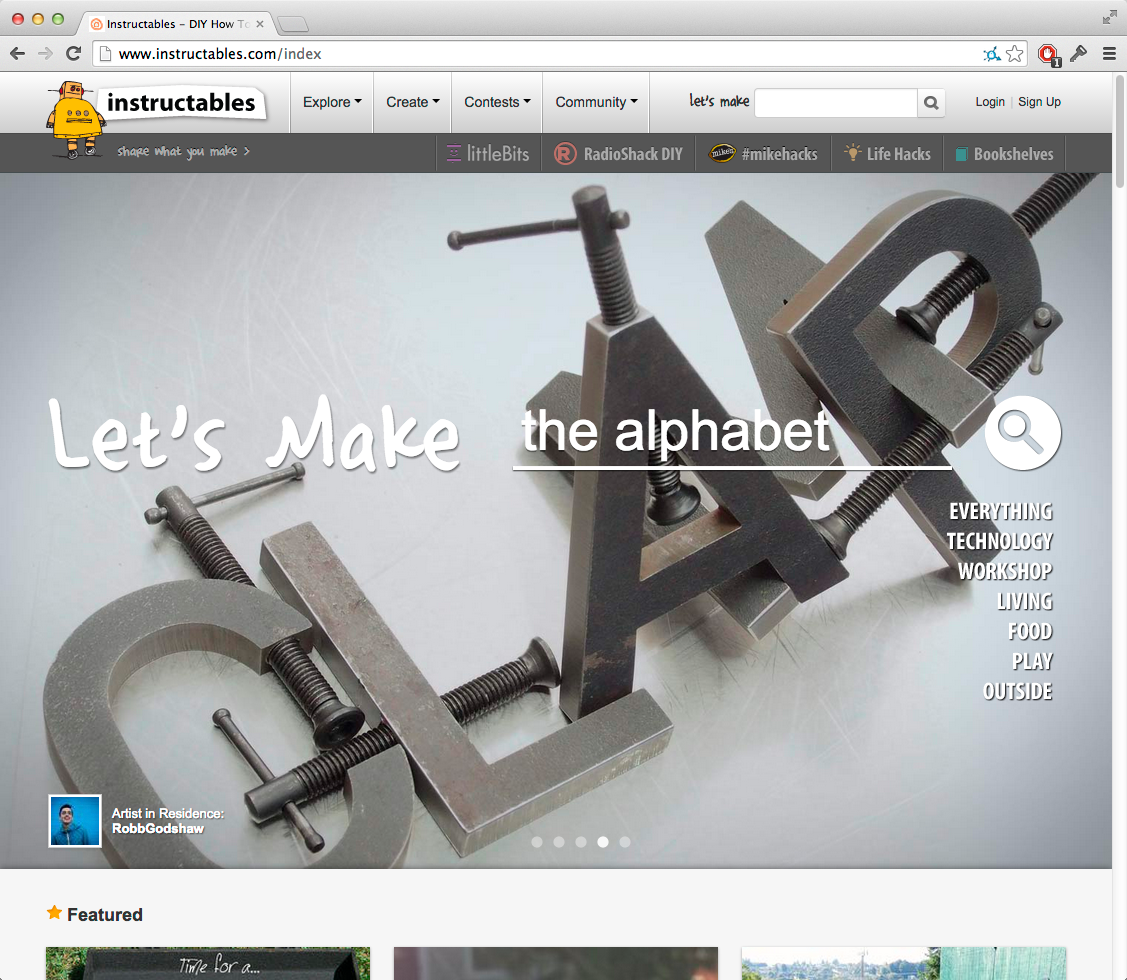
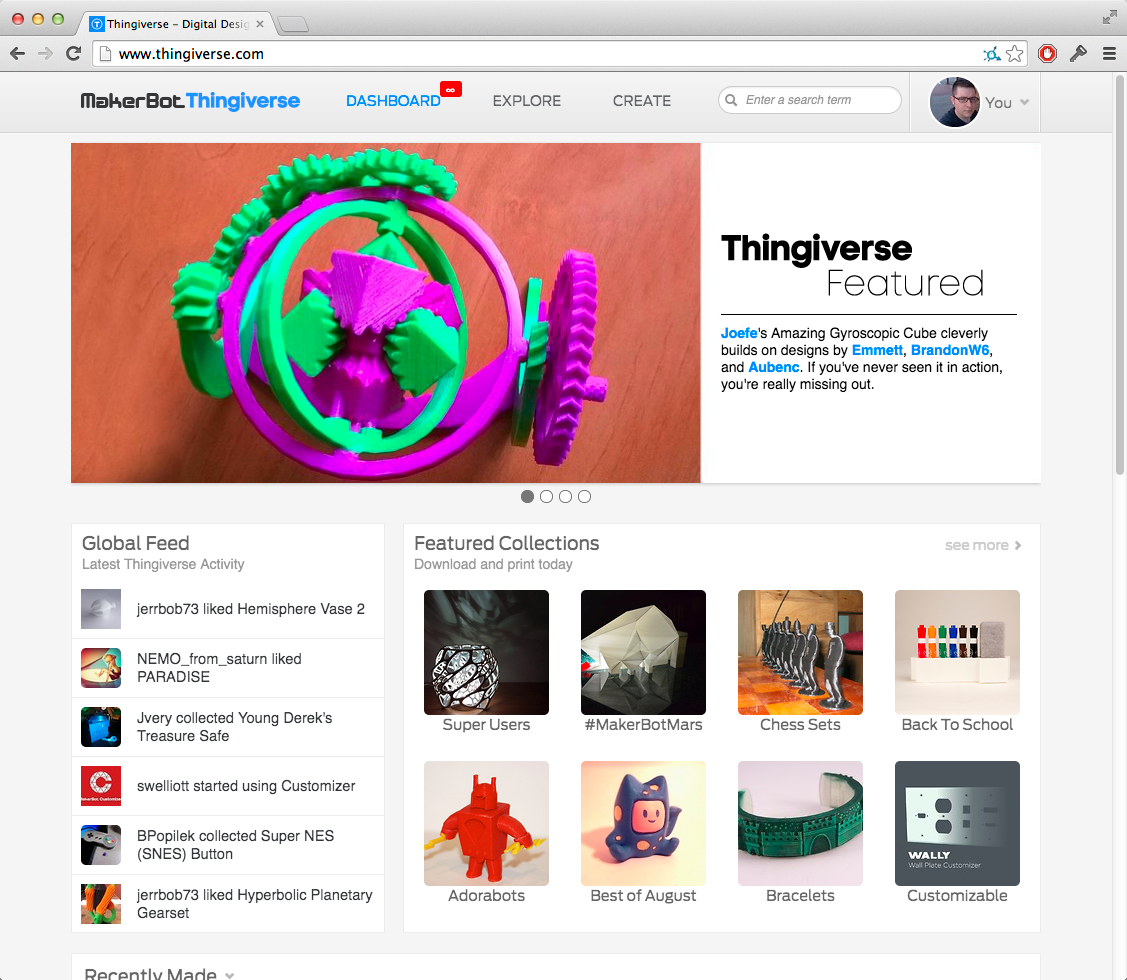
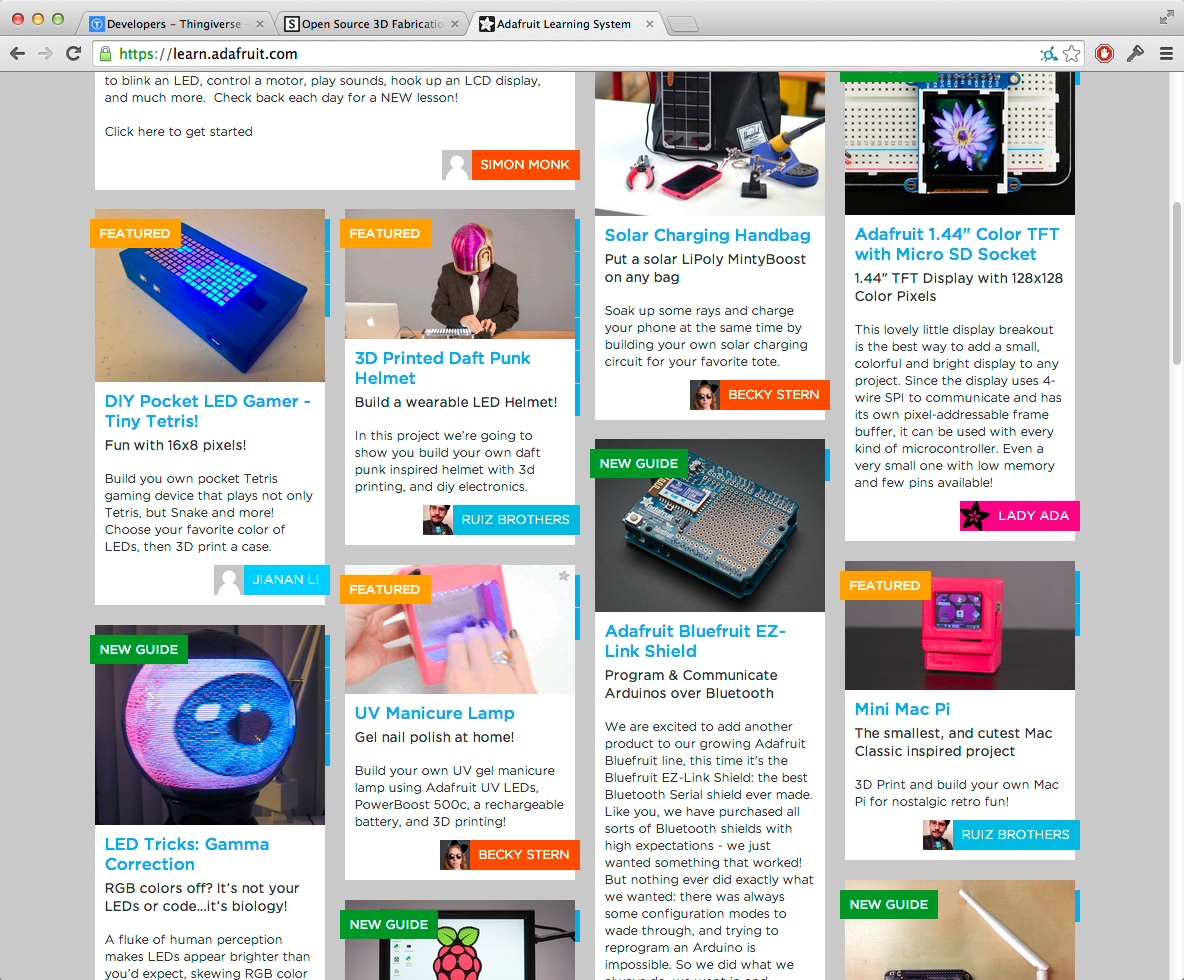
Fabrication on demand, design- and skill-sharing sites.
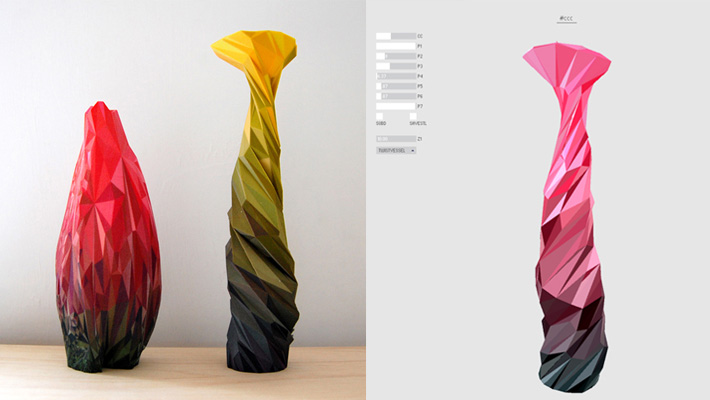
Digital Natives by Matthew Plummer Fernandez
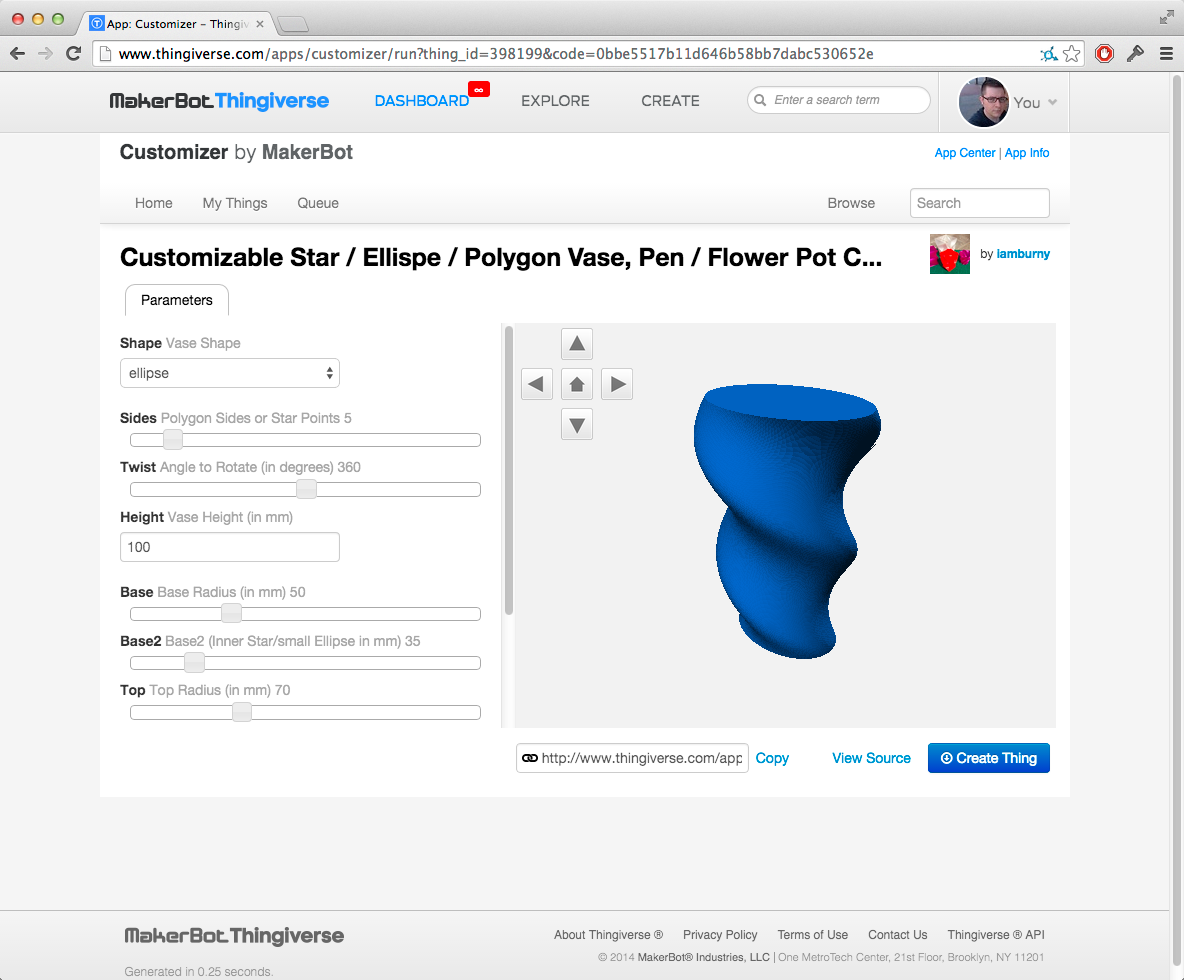
Customizable Freestyle Base Vase by anoved
Customizer is based on OpenSCAD so you can make your own customizable things.
Mataerial by Petr Novikov & Sasa Jokic
3D House Printer Construction Robot by Andrey Rudenko
RepRap
Adrian Bowyer, founder of the RepRap Project
RepRap Family Tree
Some Notable RepRap Designs
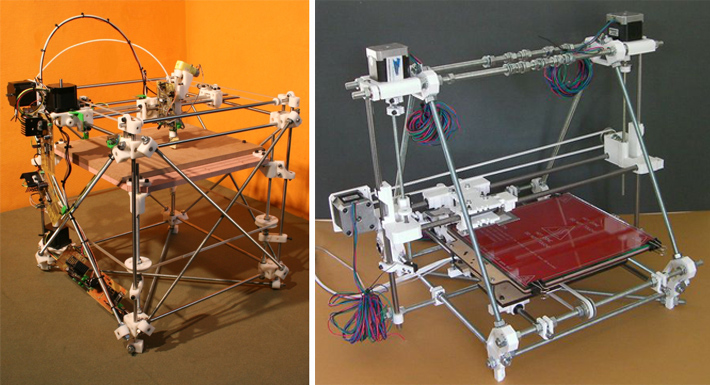
RepRap Darwin and Prusa Mendel designs
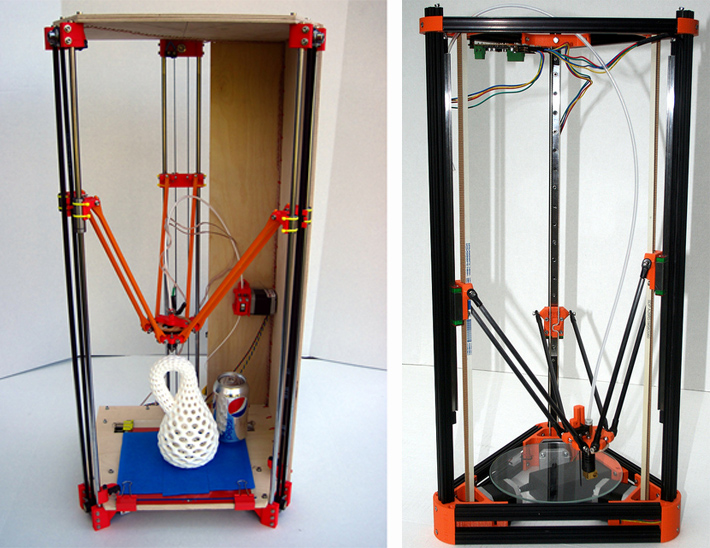
Rostock & Kossel Mini (Delta)
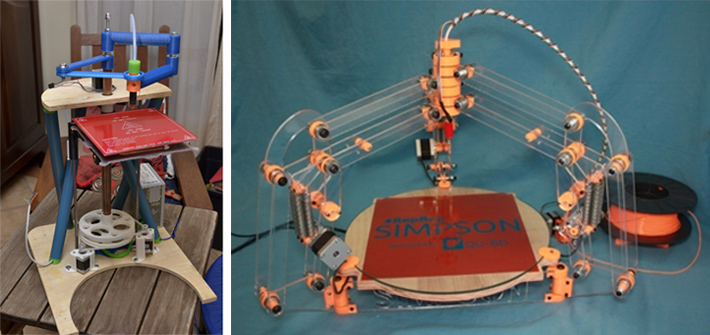
Morgan & Simpson
Beyond RepRap
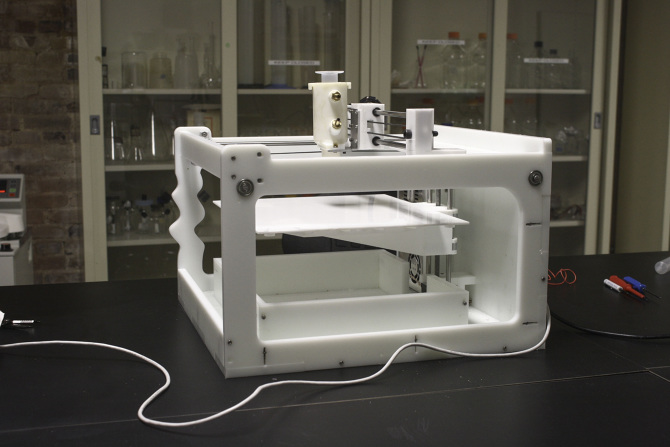
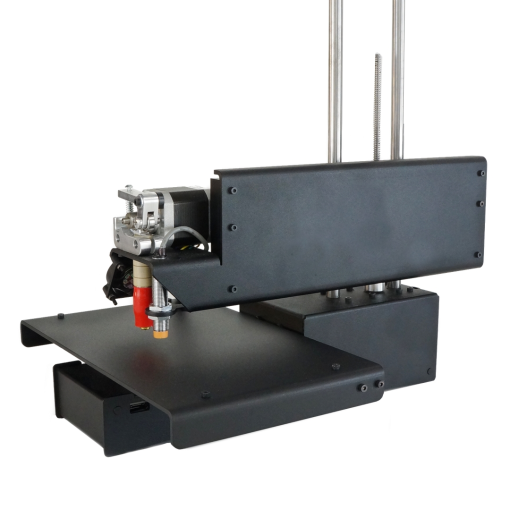
Jimmi, a locally designed printer available in the dFab.
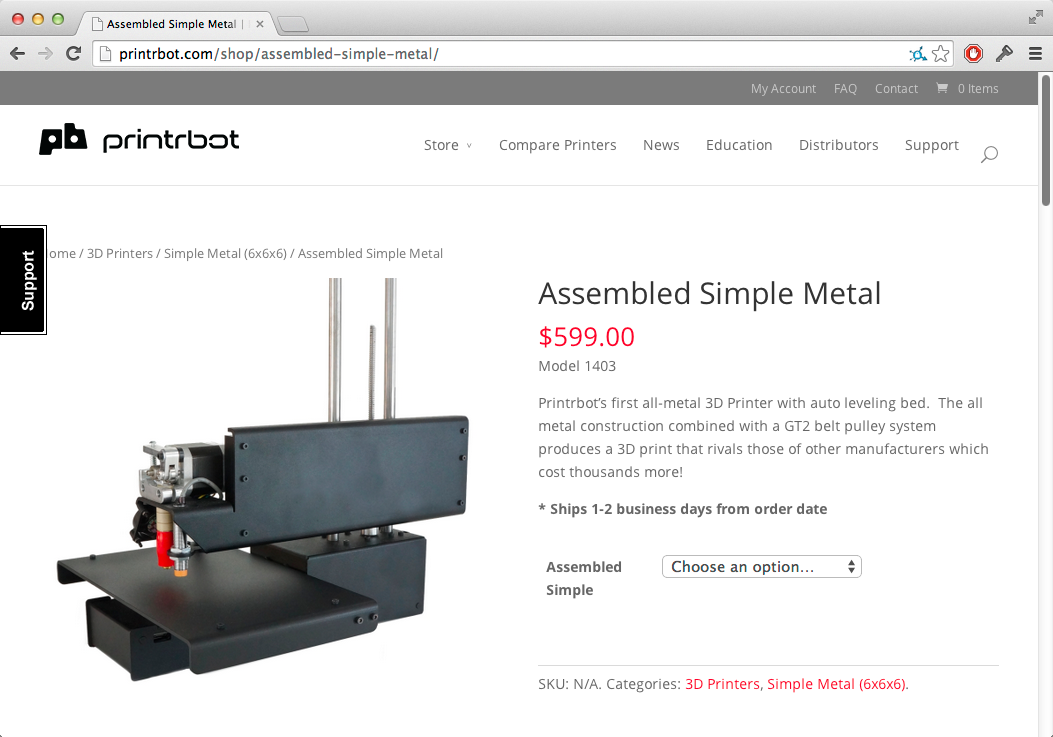
Printrbot Simple Metal, a $600 3D printer, assembled.
Let's Print Some Stuff!
Before we can do any printing, we need a file to print. Let's start with something simple:
- Resistor lead former (link)
The Printing Toolchain (Part 1)
For more details and screenshots, feel free to check out the dFab RepRap Workflow.
Please install this software on your laptop:
- Slic3r - 1.1.7 is stable, or press your luck with 1.2.0 experimental.
- Printrun (aka Pronterface)
- Slic3r configuration files for dFab RepRaps (link)
- Grab the one for Prusa i2 3mm PLA
Slic3r
- Slices an .stl file into a continuous toolpath, encoded in a language the printer can interpret (G-code)
- Setting up configuration file to work with department printers. Be sure to save the configuration for all 3 settings!
- Exploring the settings.
- Basic operation.
- Exporting g-code.
Printrun
- Communicates with/controls the printer.
- Connecting to printer.
- Loading file.
- Setting hotend and bed temperatures. Watching temperature.
- Homing the printer ("kick tires" first).
"Kicking the Tires"
Before you home the printer, you must inspect the printer. EVERY TIME!
- These printers have 3 endstops (switches). Know where they are.
- Move X and Y axis until you hear click of the switches. You will be heading oward the front left corner of the bed.
- Look at Z endstop. Does it look like it lines up with the x-carriage above it? Make sure it does.
- Put fingertip on the endstop and click the Home Z button in Printrun. Still look good? Hit home button again.
- Ideal spacing between nozzle and the glass bed is just enough space to fit a piece of paper under. Adjust endstop until it feels right.
- Test other areas on the bed by tunring off motors in Printrun and manually moving X and Y. Use corner levelers if it is way off.
- Clean off any old residue with a scraper. Clean dust and grease with vinegar and paper towel. Clean bed!
- EVERY TIME!
First Prints
- Extrude some PLA to get things going. Hit the Extrude button in Printrun once to extrude 5mm.
- When everything is loaded, ready, and inspected, press the Print button.
- Make sure to stay close to the printer in case there is a problem. Check on it periodically.
- Pause the print if there is a problem.
- Turn off heat, scrape, and restart if you want to start over.
- In case of emergency, pull the POWER CABLE not the USB CABLE!
- Estimated time to print at bottom.
- When finished, the hotend and bed will turn off. When cool, you'll hear your parts crack off. Don't be impatient.
Homework
Order/buy 3mm PLA Filament (tonight or tomorrow).
Make sure you're buying:
- PLA
- 3mm diameter
- At least 1 lb. (more if you like!)
These vendors sell good quality stuff (There are many more online, but the quality varies. THIS KIND OF THING WILL CAUSE YOU/US HEADACHES):
- Ultimachine (very high quality!
- Protoparadigm (Also nice! 10% student discount. 2.2 lb. rolls only!)
Install this stuff on your laptop:
Read this stuff (we'll discuss it in 2 weeks):
- Medium from Abstracting Craft: The Practiced Digital Hand, by Malcolm McCullough (link)
Do this stuff:
- OpenSCAD introduction tutorial (link)
- The navigation is a little confusing. Follow the links in the upper-right.
- Begin working on a small form (less than 4cm in its biggest direction). Try starting with something that has a flat bottom and minimal overhang. Bring .scad file to class next week.